Featured Post

Kerala's First 3D Printed Building

Created as a showcase project, AMAZE-28, the single-room summer house, was successfully constructed within 28 days on the grounds of the Kerala State Nirmithi Kendra. The 3D-printed building at the Kerala State Nirmithi Kendra in Thiruvananthapuram. (Photo: Shekunj)  The inauguration of Kerala's inaugural 3D-printed structure, a 380-square-foot single-room summer house, is scheduled to take place on October 10 at the Kerala State Nirmithi Kendra (Kesnik) campus located in PTP Nagar, Thiruvananthapuram.  Conceived as a showcase initiative, the summer house named AMAZE-28 was successfully finished within a mere 28 days. This impressive project was executed by Tvasta, a construction technology startup based in Chennai, founded by alumni of IIT-Madras, who have entered into a memorandum of understanding (MoU) with Kesnik.  AMAZE-28 is perched upon a concrete foundation atop a gentle elevation within the Kesnik campus. Febi Varghese, the Director and Chief Executive Officer of Kesnik, p

Making The 3D Printed Logo for Youtube Channel

I have YouTube channel as well, for my channel I decided to make showpiece containing the name of channel. I wanted to place that showpiece on my table while recording the video for my channel. Hence, I came up with an idea to use 3D printing, laser engraving and some electronics items to make this showpiece. In this article, I am explaining the complete fabrication process for making that showpiece.

 Part and Components used

In this project, following components has been used:
  1. PLA Filament (For 3D Printing)
  2. Acrylic sheet with engraved channel name
  3. LED Strip
  4. 5mm DC Jack
  5. 12V DC Power source 
  6. Glue to assemble the 3D printed parts
  7. Soldering iron
  8. Computer to design the housing/casing
The complete methodology to complete this project  contains - laser engraving, designing, 3D printing, assembling, LED strip installation. Now, I am going to explain each of these steps.

Laser Engraving

I choose a 150mmX30mmX5mm acrylic sheet strip to engrave the name of my website/ Youtube channel (TechKnowLab) with the help of laser engraving machine. The engraved part is shown below.
 
Website name engraved on the acrylic sheet.

Designing 

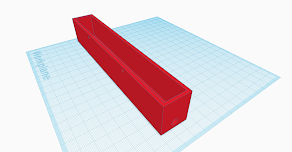
Next step is to design the housing/casing that can house this engraved part and LED strip. I want to 3D print this part, hence I need CAD model of all the parts. I have designed all the parts on Tinkercad. All the part images and CAD files are listed below.


3D Printing the Parts

All the designed parts (above) were fabricated using fused filament fabrication based 3D printing process. The material used for the 3D printing is PLA.  All the 3D printed parts are given below.
 
All the 3D printed parts.

 Assembling and LED Strip Installation

 All the parts have been 3D printed. Now All the parts have to be assemble and glued together. The LED strip has to be installed for glowing up the engraved characters. Hence An LED strip has been installed inside this casing. A 5mm DC jack has also be installed in the lower block of the housing. The LED strip has been connected with this DC jack for power supply. 

Working of Final Assembly

Final working prototype of the logo showpiece.


Now the project is assembled and working properly. Comment below how it is looking? 


Comments

Popular posts from this blog

Controlling LEDs over WiFi using NodeMCU and Blynk App.

This article is the base on the Internet of things ( IoT ) . IoT describes the network of physical objects—“things” or objects—that are embedded with sensors, software, and other technologies for the purpose of connecting and exchanging data with other devices and systems over the Internet. In this article 3 LEDs will be controlled by an android application (made using Blynk) over a wifi connection. How to use NodeMCU with Blynk  If you want to start learn the Internet of Things (IoT) concept, then controlling a LED over the  internet is the " Hello World!" of the IoT journey. Performing the " Hello World" task will be easy using NodeMCU micro-controller as the first client and Blynk as the 'broker' or server and Blynk android application as the second client. Now communication between two clients will happen through broker over the internet. Now lets, make this happen.  Components Required For this activity we will need following components: Nod

Kerala's First 3D Printed Building

Created as a showcase project, AMAZE-28, the single-room summer house, was successfully constructed within 28 days on the grounds of the Kerala State Nirmithi Kendra. The 3D-printed building at the Kerala State Nirmithi Kendra in Thiruvananthapuram. (Photo: Shekunj)  The inauguration of Kerala's inaugural 3D-printed structure, a 380-square-foot single-room summer house, is scheduled to take place on October 10 at the Kerala State Nirmithi Kendra (Kesnik) campus located in PTP Nagar, Thiruvananthapuram.  Conceived as a showcase initiative, the summer house named AMAZE-28 was successfully finished within a mere 28 days. This impressive project was executed by Tvasta, a construction technology startup based in Chennai, founded by alumni of IIT-Madras, who have entered into a memorandum of understanding (MoU) with Kesnik.  AMAZE-28 is perched upon a concrete foundation atop a gentle elevation within the Kesnik campus. Febi Varghese, the Director and Chief Executive Officer of Kesnik, p

How to Know the NodeMCU IP Address for Your Next IoT Project

  NodeMCU IP Address: The NodeMCU is a popular development board for IoT projects. It’s small, affordable, and comes with built-in Wi-Fi connectivity, making it the perfect choice for creating connected devices. But before you can start building your NodeMCU projects, you need to know the IP address of your device. This IP address is essential for communicating with the NodeMCU from another device, such as a computer or smartphone. In this article, we’ll show you how to find the NodeMCU IP address, so you can get started with your next IoT project. Method 1: To Know the NodeMCU IP Address One of the easiest ways to find the NodeMCU IP address is by using the serial monitor in the Arduino IDE. First, connect your NodeMCU board to your computer using a micro-USB cable. Then, upload the following code to the NodeMCU: #include <ESP8266WiFi.h> void setup() { Serial.begin(115200); Serial.println(); Serial.print("Connecting to "); Serial.println("